


Using Plain Math in Psykinematix Standard Edition
Custom stimuli is one of the most powerful features in Psykinematix Standard Edition. It gives you the ability to describe complex spatio-temporal and chromatic stimuli using plain Math without the boilerplate code you would typically need when using a programming language like C, Matlab or Python (you know: those loops, array initializations, etc). With Psykinematix, you just use the same mathematical expression you would include in your manuscript. For example, to generate a horizontal grating as a custom stimulus in Psykinematix, you would simply enter its minimal expression and specify the values for the parameters in useful units, i.e. the spatial frequency sf in cycles per degree and the phase phi in degrees, as illustrated below:
When modifying the stimulus expression or changing the parameter values, Psykinematix would also update the stimulus preview accordingly at design time, and at run-time, Psykinematix would automatically:
- convert the parameters to the appropriate units for rendering purpose (e.g. from degrees to pixels for spatial units using the specified viewing distance and display geometry),
- evaluate the above expression as function of the spatial (x, y, r, theta) coordinates to generate the stimulus as an OpenGL texture,
- and display this texture at a specific position and for a specific duration.
z = cos(2*pi*x*sf+phi+speed*time)
with the speed variable expressed in radian or degree units (in term of phase shift per second). At run-time, Psykinematix would automatically sample the time variable based on the display refresh rate, and generate a texture for each video frame of the stimulus presentation. This texture sequence would be normally generated well in advance before the actual stimulus presentation to ensure an optimal timing because the stimulus generation may actually take, depending on the stimulus complexity, more time than available during 2 consecutive video frames. This precomputation however may require some significant amount of memory to store the whole sequence depending on the stimulus size and duration. As a result, the dynamic presentation of a full-screen stimuli presented for just a few seconds could easily take several gigabytes of memory and would require to make some compromises if constrained by the available video memory (see the math here!). But we should be able to do better, right?
Using GLSL Shader in Psykinematix GPU Edition
Yes we can, thanks to the advances in the GPU technology (Graphics Processing Unit) present in modern graphics card. The Psykinematix GPU Edition took advantage of the GPU ability to run small C-like programs, called GLSL shaders, in parallel at a pixel level. But Psykinematix goes a step farther: it takes the exact same mathematical expression entered above, converts it to a GLSL shader, and compiles it on the fly to generate complex stimuli in real-time, all of this being mostly transparent to the user. As illustrated below, Psykinematix GPU Edition provides a live preview of the stimulus using a GLSL shader. And anytime the user changes the value of a parameter or modifies the mathematical expression, the GLSL preview is updated on-the-fly. By the way, the drifting grating shown below is also produced by a GLSL shader running right inside your browser!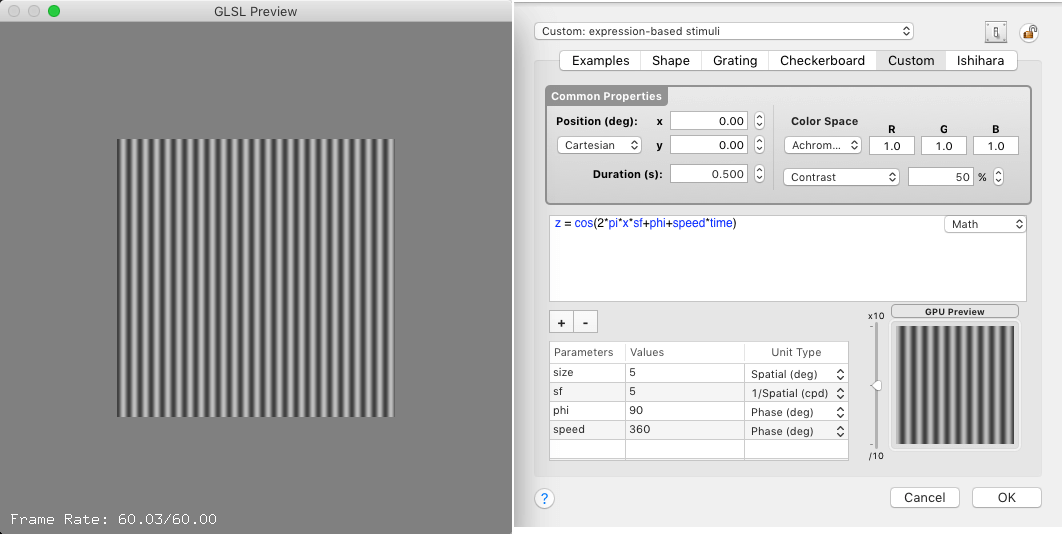
not a movie file
but a GLSL shader
running in real-time
inside your browser !
Though the GLSL shader technology has been around for 15 years, it has not yet been used widely by users of the various psychophysics packages such as the PsychoPy or PsychToolBox due to the lack of user-friendly features to take advantage of this powerful technology. But we are going to try to help you change this!
Using Psykinematix PRO Edition to export your stimulus to a variety of platforms
You may want to show or share your new favorite stimulus with everyone, not just colleagues or students, but maybe even with your friends or family members so they can better and visually understand what you are working on (as we say in French "une image vaut mille mots"). Nowadays every computer, smartphone or tablet has a powerful-enough graphics chip to generate stimuli in real-time using these GLSL shaders even inside a Web browser as shown above. We just need some better tools!One of the numerous new features to appear in the next major Psykinematix update coming later this year (Pro Edition) will allow you to just do that: create your complex and dynamic stimulus in Psykinematix and export it to a variety of platforms without having to write a single line of code. One of the available options will even export your stimulus as a standalone HTML5 widget with interactive capabilities, an ideal way to share and demonstrate your stimuli with others.
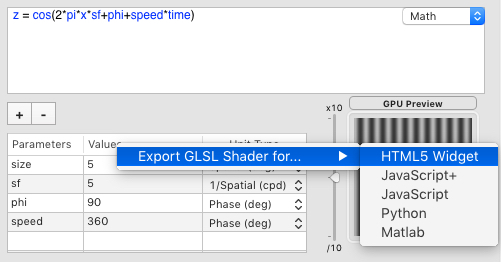
With Psykinematix Pro Edition, it will take no more than 10 seconds to export your stimulus for JavaScript, Python or Matlab, with just 3 simple steps:
- enter your stimulus equations in Plain Math,
- control-click the preview and select “Export GLSL Shader for…” for the target language,
- and give a name to the target file (the correct extension will be automatically added: .wdgt, . html, .py or .m for example).
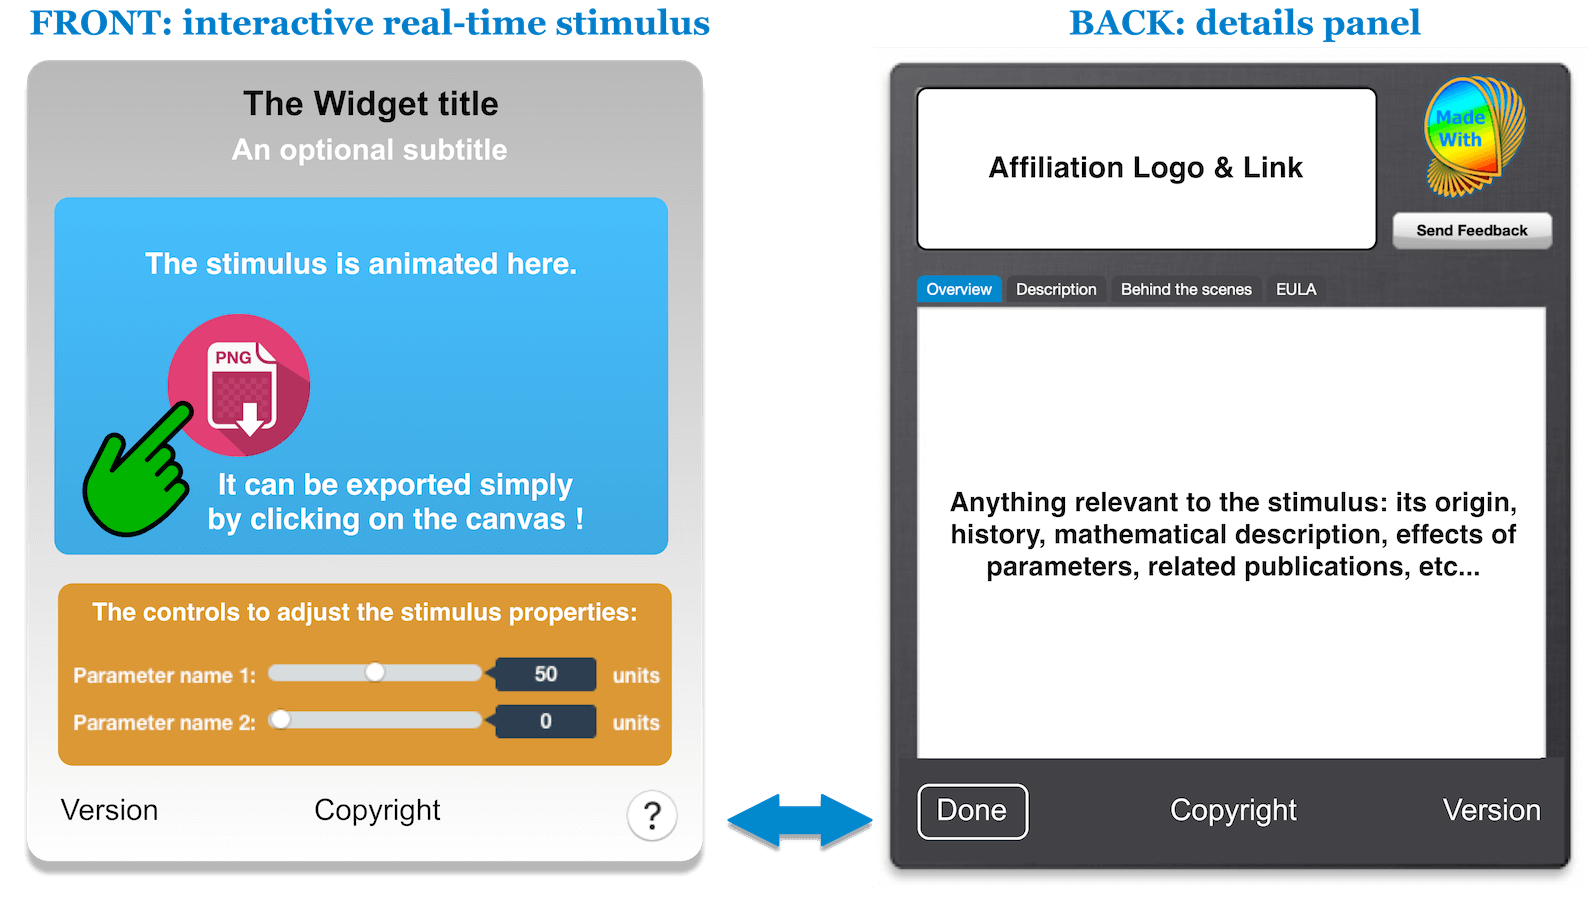
Anatomy of a Psykinematix Widget

As for the HTML5 widgets (we call them "iGLWidgets"), they will run on any platform with a modern Web browser that supports WebGL (including iOS and Android). Below is a very simple example of interactive Widget generated with Psykinematix Pro, but imagine the possibilities! You can discover more complex examples in our growing widgets collection …
Here are a few case scenarios the new export tool in Psykinematix Pro may be useful for:
- you are using Psykinematix to prototype an experiment before designing the final version using Python or Matlab
- you would like to embed dynamic stimuli in the HTML version of your manuscript
- you would like your student to intuitively grasp the role of spatial, temporal and chromatic parameters in some visual stimuli
- you are looking for a multi-platform interactive Web-based solution to demo your stimuli
Last updated: 1 September 2020